Welcome to the BNet "Quickstart" Tutorial.
Here, we'll teach you how to install ButterflyNet.
First, download this ZIP File. (It's 160 MB in size, so it might take a minute, or longer if you're not on campus.)

Unzip it and place the BNet folder in your Program Files folder. The easiest way to do this is to right-click the zip file and choose Extract All...
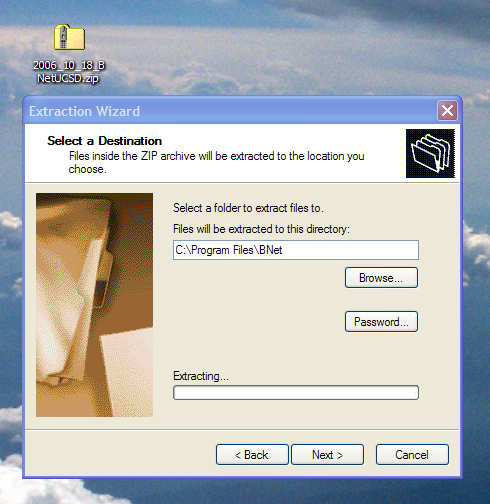
In C:\Program Files\BNet, you will find two folders. Navigate to ButterflyNet\install.
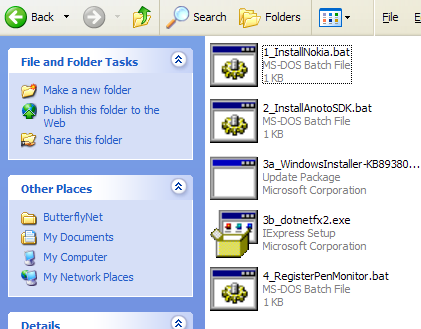
There are four steps to complete the installation.
- The first install is the pen drivers.
- If you have a Logitech or Nokia pen, run the appropriately named batch file.*
- If you have a Maxell (PaperIQ) pen, do not run either batch file. Instead, download the Maxell installer, extract it to a temporary directory, and run setup.exe.
- The second installs the Anoto SDK software.
- The third (a & b) installs the .NET framework 2.0.
- The fourth one registers the pen monitor so that ButterflyNet can download notes from your pen.
* If you get errors about not having Microsoft .NET Framework 1.1 installed already (many, but not all, computers already do), you'll need to download .NET Framework 1.1 from Microsoft and install it before proceeding.
The fourth script will ask you to apply some settings to your Windows Registry. Click OK.

After you run these setup scripts, do not rename or move the BNet folder. If you do, you must rerun setup script #4 (RegisterPenMonitor).
Create a shortcut to ButterflyNet.exe and place it on your Desktop or in your Start Menu.
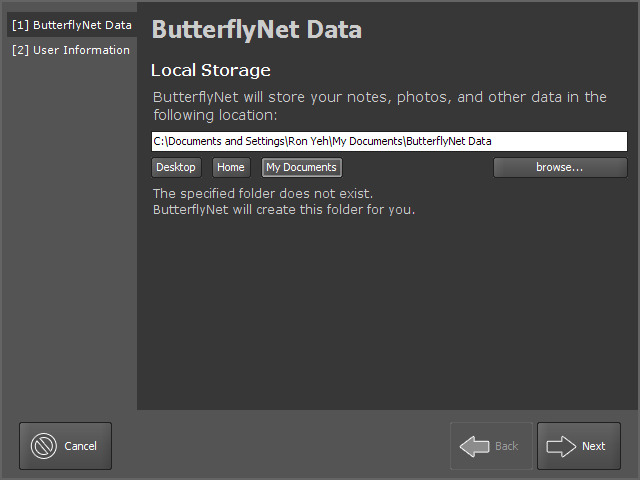
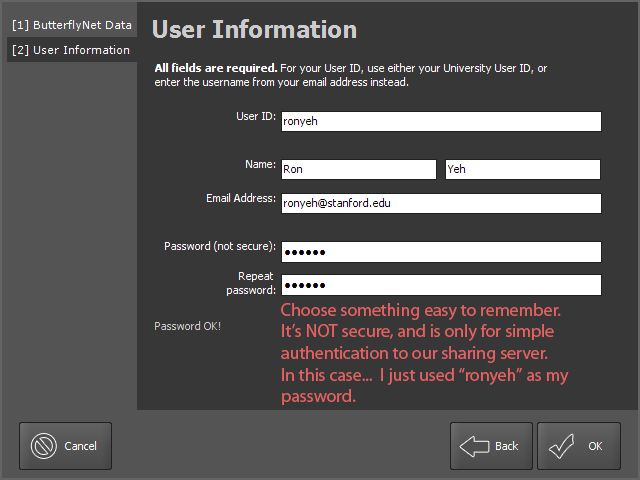
Run ButterflyNet. Follow the two-step Wizard to enter your information. Remember, do not use a real password!
After you click OK, BNet begins to load. (It might take a while, please be patient.)

If your pen is not charged, please charge it now.
- Logitech and Maxell pens must be charged using the USB cradle. Plug the cradle into your computer and put the pen in the cradle. (The pen will sync with the computer; ignore this for now.)
- Nokia pens may be charged either by plugging the charger into the top of the pen OR by plugging the charger into the bottom of the cradle and putting the pen in the cradle. The cradle does not need to be connected to the computer.
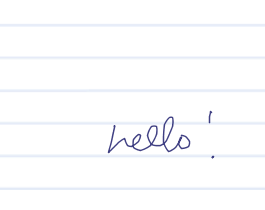
Once your pen is charged, write something simple (like "hello") in your notebook. Plug your cradle into the computer and drop the pen into the cradle. A popup lets you know that ButterflyNet is reading your pen data.
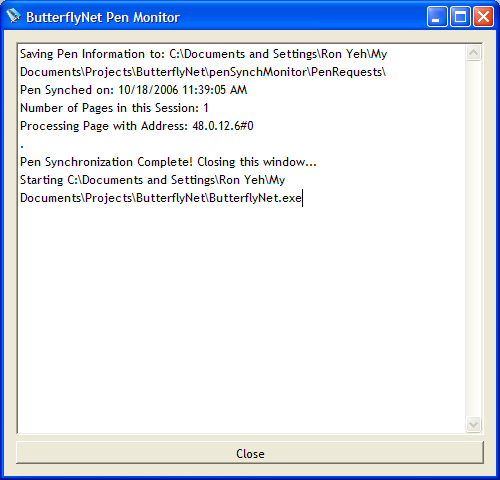
Your pen's clock is now synchronized. Writing something simple and synchronizing the pen's clock is necessary whenever you hard-reset the Pen, or if you purchased a new Pen. In general, you only need to do this once.
Currently, you need to hit the Refresh button to load the notes into BNet. This will hopefully be automatic in future versions.

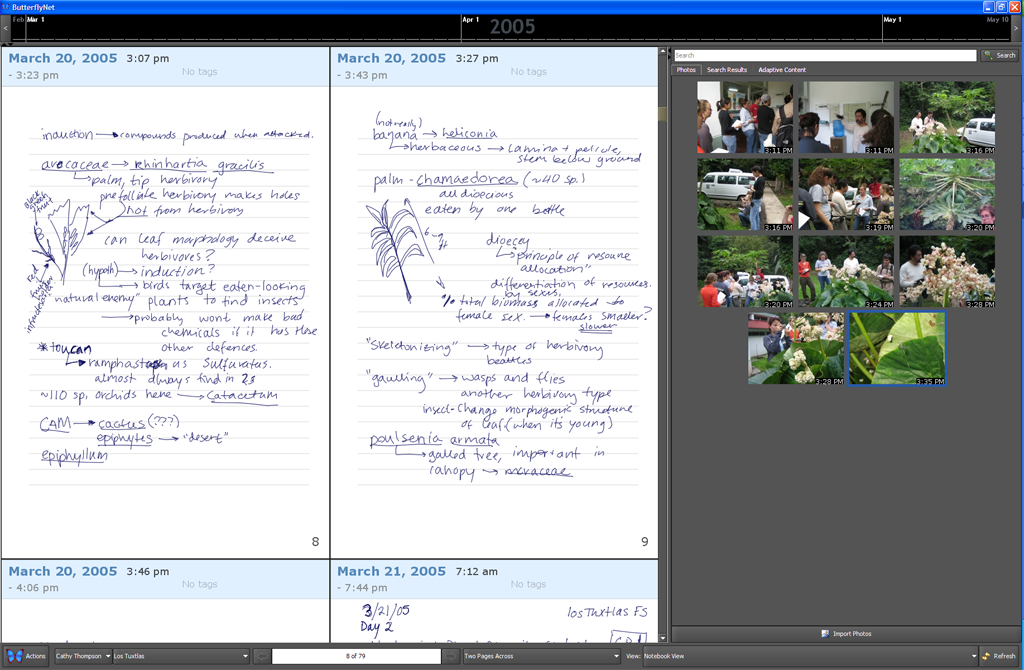
Your notes should appear in the main panel.
To import images, use the Import Photos button and select a set of JPEGs. These will be copied to your User Directory.
Once again, the current version requires a click of the Refresh button to see newly added notes! We hope to fix this soon.
Feel free to explore and send us your feedback and suggestions!